When we use a laptop or PC, we installed so many programs or software, which takes a lot of space in our system. We have to clean up these unwanted programs or software but don’t know-how.
Don’t worry here is the solution, if you are using window 10 and want to free up space, this blog is for you.
This blog shows you how you can uninstall a program using CMD (command prompt) in window 10.
Process to uninstall a program using CMD
Following are the steps of uninstalling a program using CMD (Command Prompt) in window 10:-
Step 1.
The first step is to click on the window button and type CMD in the search button.
Step 2.
After that right-click on CMD and then tap on Run as administrator. A command prompt window appears on your screen.

Step 3.
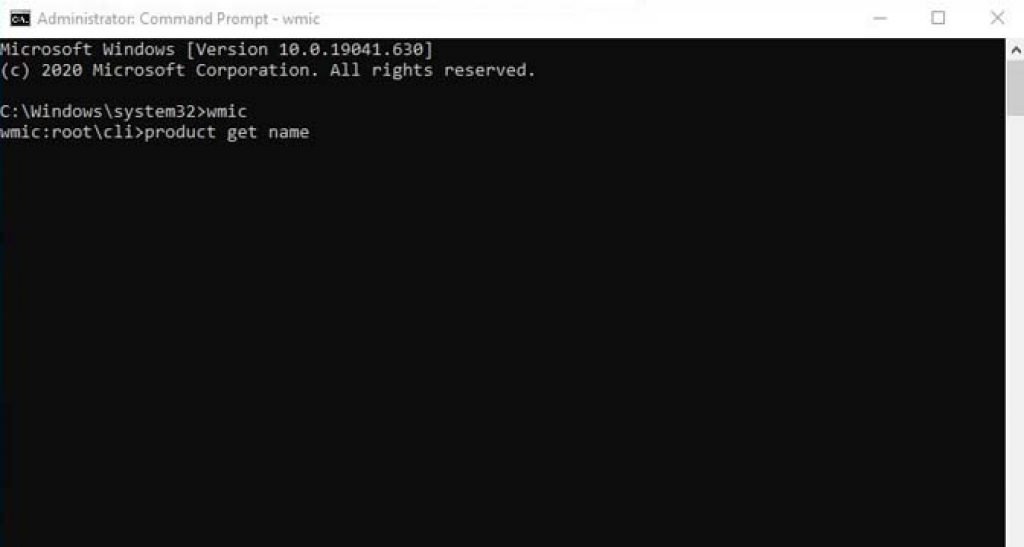
Now you have to type “wmic” in the window management instrumentation command-line utility and tap on the Enter button.

Step 4.
When you tap on the Enter button, a command appears in which you have to type “product get name.“

Step 5.
The command will list the program installed on your system.
Step 6.
After that, now find the program name you want to uninstall. Now type the command product where name=” program name” call uninstall

· Make sure that the program’s name will replace the program name which you want to uninstall.
Step 7.
In this step, a confirmation window appears. Now you have to type “Y” on the command and press the Enter button.

Step 8.
At last, you will see a success message when this process is completed.

Finally, its done, now you can uninstall the unwanted program or software from your laptop or PC in window 10.
Conclusion
In the above blog, we give you the best way of uninstalling the unwanted program or software from a PC or laptop.
It is the easiest method of uninstalling any program or software. We hope that you like it.


